Looking for a festive, delicious, and easy-to-make dessert for Easter? These Easter No-Bake Mini Cheesecakes are the perfect choice! They are creamy, colorful, and customizable, making them the ideal treat for celebrating the holiday. With a buttery shortbread cookie crust, a rich and tangy cream cheese filling, and a touch of whimsy from candy eggs and sprinkles, these mini cheesecakes will delight your guests and bring a smile to everyone’s face. Plus, there’s no need to turn on the oven, making them a great option for a warm spring day.
These mini cheesecakes are as fun to decorate as they are to eat. The vibrant gel food coloring adds a playful Easter touch, while the whipped cream and candy eggs elevate the visual appeal. Whether you’re hosting a family gathering or bringing a sweet treat to a potluck, these no-bake cheesecakes will steal the show. They’re also a great way to get creative in the kitchen with your favorite decorations, ensuring that each cheesecake is a little masterpiece.
Why You’ll Love This Recipe
1. No Baking Required
No need to worry about preheating the oven or dealing with complicated baking times. These mini cheesecakes come together in the fridge, making them a stress-free dessert.
2. Perfect for Easter
The vibrant colors, festive decorations, and candy eggs make these mini cheesecakes a perfect Easter treat, adding a touch of fun to your holiday celebration.
3. Creamy and Tangy
The rich cream cheese filling is smooth and decadent, with just the right amount of tang, making each bite irresistible.
4. Customizable Decorations
From food coloring to whipped cream and candy eggs, you can decorate these cheesecakes to match your Easter theme, making them both beautiful and delicious.
5. Easy to Make
This recipe is simple and straightforward, with minimal ingredients and no complicated steps. Perfect for bakers of any skill level!

Ingredients
- Shortbread cookies (approx. 12 round cookies)
- Unsalted butter (melted)
- Cold water
- Unflavored powdered gelatin (1 packet)
- Cream cheese (full-fat, at room temperature)
- Granulated sugar
- Lemon juice
- Vanilla bean paste (or vanilla extract)
- Salt
- Heavy cream (at room temperature)
- Assorted gel food coloring (4 colors recommended)
- Whipped cream (for decorating)
- Candy eggs (for decorating)
- Sprinkles (for decorating)
Variations
- Chocolate Crust: Substitute the shortbread cookies with chocolate wafer cookies for a different flavor profile that pairs wonderfully with the cheesecake filling.
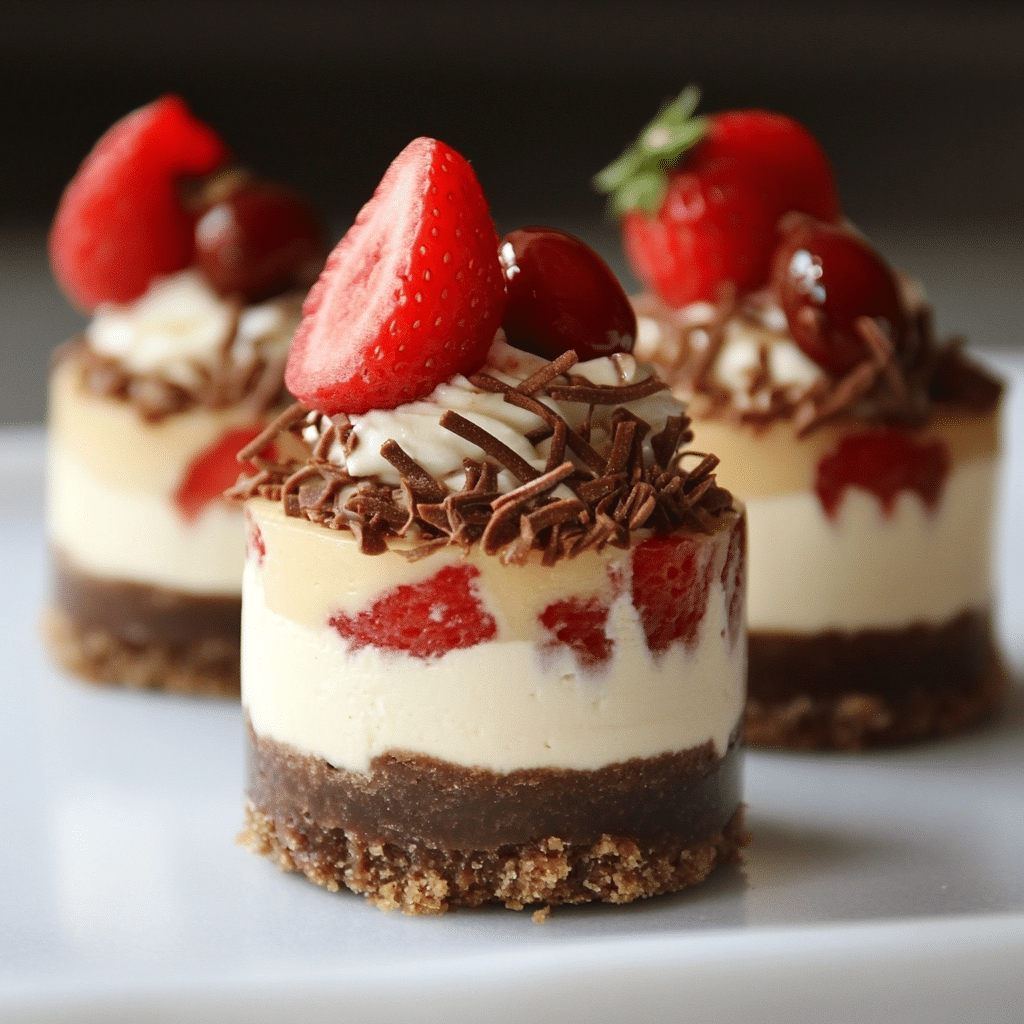
- Fruit Topping: Instead of candy eggs, top the mini cheesecakes with fresh berries like strawberries, blueberries, or raspberries for a fresh and slightly tart contrast.
- Flavor Twist: Add a splash of orange zest or a few tablespoons of fruit puree to the cream cheese filling to infuse new flavors.
- Lighter Option: Use light cream cheese and whipped topping for a lower-fat version of the mini cheesecakes.
How to Make the Recipe
Step 1: Prepare the Cookie Crust
In a food processor or by hand, crush the shortbread cookies until they become fine crumbs. Mix the crumbs with the melted butter and cold water until combined. Press this mixture into the bottoms of mini cheesecake pans or muffin tin liners to form a firm crust. Place the crusts in the refrigerator to set while you prepare the filling.
Step 2: Dissolve the Gelatin
In a small bowl, combine the cold water and unflavored gelatin. Let it sit for a few minutes to bloom. After it has absorbed the water, heat the mixture in the microwave for 10-15 seconds or until the gelatin is fully dissolved. Set it aside to cool.
Step 3: Make the Cheesecake Filling
In a large bowl, beat the cream cheese with a hand mixer or stand mixer until smooth and creamy. Add the granulated sugar, lemon juice, vanilla bean paste (or vanilla extract), and salt. Mix until the ingredients are fully combined. Gradually add the dissolved gelatin and continue to beat until the mixture is smooth.
Step 4: Whip the Cream
In a separate bowl, whip the heavy cream until soft peaks form. Gently fold the whipped cream into the cream cheese mixture, being careful not to deflate the cream.
Step 5: Add Food Coloring
Divide the cheesecake mixture into several bowls, depending on how many colors you want to use. Add a few drops of gel food coloring to each bowl and mix until the desired colors are achieved.
Step 6: Assemble the Mini Cheesecakes
Spoon or pipe the colored cheesecake filling into the prepared crusts, layering the different colors if you like. Use a toothpick or skewer to swirl the colors together for a marbled effect. Refrigerate the mini cheesecakes for at least 4 hours or overnight until they are fully set.
Step 7: Decorate
Once the cheesecakes are set, top them with whipped cream, candy eggs, and sprinkles for a festive Easter touch. Serve and enjoy!

Tips for Making the Recipe
- Room Temperature Cream Cheese: Make sure the cream cheese is at room temperature for a smooth, lump-free filling.
- Gelatin Tips: If you’re unfamiliar with working with gelatin, be sure to dissolve it fully in the water before adding it to the filling. This ensures the cheesecake sets properly.
- Whipping the Cream: Don’t overwhip the cream; stop as soon as you reach soft peaks, so the whipped cream folds easily into the cheesecake mixture.
- Crust Texture: Press the cookie crust firmly into the base of the pan to ensure it stays intact when you serve the cheesecakes.
How to Serve
These Easter No-Bake Mini Cheesecakes are best served chilled. Arrange them on a platter or individual dessert plates for a colorful, festive presentation. Pair them with a refreshing drink like iced tea or lemonade for a perfect dessert experience.
Make Ahead and Storage
Storing Leftovers
Store any leftover mini cheesecakes in an airtight container in the refrigerator for up to 4 days. Be sure to keep them chilled to maintain their texture and flavor.
Freezing
While these cheesecakes are best served fresh, you can freeze them before decorating. Wrap them tightly in plastic wrap and foil and freeze for up to 3 months. To serve, thaw them in the refrigerator overnight, then decorate with whipped cream, candy eggs, and sprinkles before serving.
Reheating
These cheesecakes do not require reheating, as they are served chilled and maintain their texture when cold.
FAQs
1. Can I use regular gelatin instead of powdered gelatin?
No, the unflavored powdered gelatin is necessary to help the cheesecake set. Regular gelatin may not work as effectively.
2. Can I use a different type of crust?
Yes, you can use graham crackers, chocolate wafer cookies, or even a gluten-free cookie crust as a base for the mini cheesecakes.
3. Can I make these cheesecakes without food coloring?
Absolutely! If you prefer a simpler look, you can make them without food coloring or use just one color for a uniform appearance.
4. Can I use low-fat cream cheese?
Yes, you can use low-fat cream cheese, but the texture may be slightly different. Full-fat cream cheese provides the creamiest texture.
5. Can I decorate with fresh fruit instead of candy eggs?
Yes, fresh berries like strawberries, raspberries, or blueberries can make a delicious and colorful topping for these mini cheesecakes.
6. Can I use whipped topping instead of whipped cream?
Yes, you can use whipped topping as a substitute for whipped cream, but the texture may be a little lighter.
7. How long do these cheesecakes need to set?
For best results, chill the mini cheesecakes for at least 4 hours or overnight to ensure they set properly.
8. Can I double the recipe for a larger crowd?
Yes, simply double the ingredients and use a larger pan or muffin tin to make more mini cheesecakes.
9. Can I use vanilla extract instead of vanilla bean paste?
Yes, vanilla extract is a great substitute for vanilla bean paste if you don’t have it on hand.
10. How can I make these cheesecakes gluten-free?
Use gluten-free cookies for the crust, and ensure all your other ingredients are gluten-free.

Conclusion
These Easter No-Bake Mini Cheesecakes are a perfect dessert for any Easter celebration. With a creamy and tangy filling, a buttery cookie crust, and fun, colorful decorations, they are sure to impress your guests. Plus, they’re incredibly easy to make and don’t require any baking! Whether you’re hosting a large gathering or just want a treat for your family, these cheesecakes are a festive and delicious way to celebrate the holiday.
Print
Easter No-Bake Mini Cheesecakes
- Total Time: 4 hours 20 minutes
- Yield: 12 mini cheesecakes 1x
- Diet: Vegetarian
Description
These adorable and festive No-Bake Mini Cheesecakes are the perfect Easter treat! With a crunchy shortbread crust and creamy cheesecake filling, these mini desserts are topped with vibrant pastel colors, whipped cream, and candy eggs for a sweet, indulgent bite that everyone will love.
Ingredients
For the crust:
-
6 oz shortbread cookies (approx. 12 round cookies)
-
0.5 oz unsalted butter (1 tablespoon), melted
For the cheesecake filling:
-
2 tablespoons cold water
-
1 packet unflavored powdered gelatin (1/4 oz or 2.5 tsp, see note below)
-
1 lb cream cheese (full-fat), at room temperature
-
3.5 oz granulated sugar (½ cup)
-
½ teaspoon lemon juice
-
1 teaspoon vanilla bean paste (can substitute vanilla extract)
-
Pinch of salt
-
1 cup heavy cream (at room temperature)
For decoration:
-
Assorted gel food coloring (4 colors recommended, I use Americolor brand)
-
½ cup whipped cream (to decorate)
-
Candy eggs (to decorate)
-
Sprinkles (to decorate)
Instructions
-
Prepare the Crust:
In a food processor, pulse the shortbread cookies until they are fine crumbs. Add the melted butter and pulse until the crumbs are evenly coated.
Spoon the mixture into mini cheesecake pans or muffin tins lined with paper liners. Press down gently to form an even crust. Chill in the fridge for about 10–15 minutes to set. -
Prepare the Gelatin:
In a small bowl, combine the cold water with the powdered gelatin. Let it sit for 5–10 minutes to bloom, then microwave for 10–15 seconds to dissolve, stirring until smooth. -
Make the Cheesecake Filling:
In a large mixing bowl, beat the room-temperature cream cheese with the sugar, lemon juice, vanilla paste, and a pinch of salt until smooth and fluffy.
In a separate bowl, whip the heavy cream until stiff peaks form. Carefully fold the whipped cream into the cream cheese mixture, then add the dissolved gelatin and mix until fully combined. -
Color the Cheesecake Mixture:
Divide the cheesecake mixture into separate bowls, depending on how many colors you want. Add a few drops of food coloring to each bowl and mix until you reach your desired color. -
Assemble the Mini Cheesecakes:
Spoon or pipe the colored cheesecake mixture into the prepared crusts, alternating colors to create a fun, layered look. Chill in the fridge for at least 4 hours, or until set. -
Decorate:
Once the mini cheesecakes are set, top each with a dollop of whipped cream, a candy egg, and sprinkles for that festive Easter touch. -
Serve and Enjoy:
Serve chilled and enjoy these adorable no-bake mini cheesecakes for Easter or any spring celebration!
Notes
Gelatin Tip: If you’re not familiar with gelatin, ensure that you dissolve it properly to avoid lumps in the filling. If you’re using a different brand of gelatin, refer to the package instructions.
You can swap the gel food coloring for natural food coloring if you prefer a more natural option.
If you don’t have mini cheesecake pans, muffin tins work just as well.
- Prep Time: 20 minutes
- Cook Time: 4 hours (minimum)
- Category: Dessert
- Method: No-Bake Treats
- Cuisine: Easter Recipes
Keywords: no-bake cheesecake, Easter desserts, mini cheesecakes, cream cheese desserts, colorful cheesecakes, spring treats, candy eggs dessert