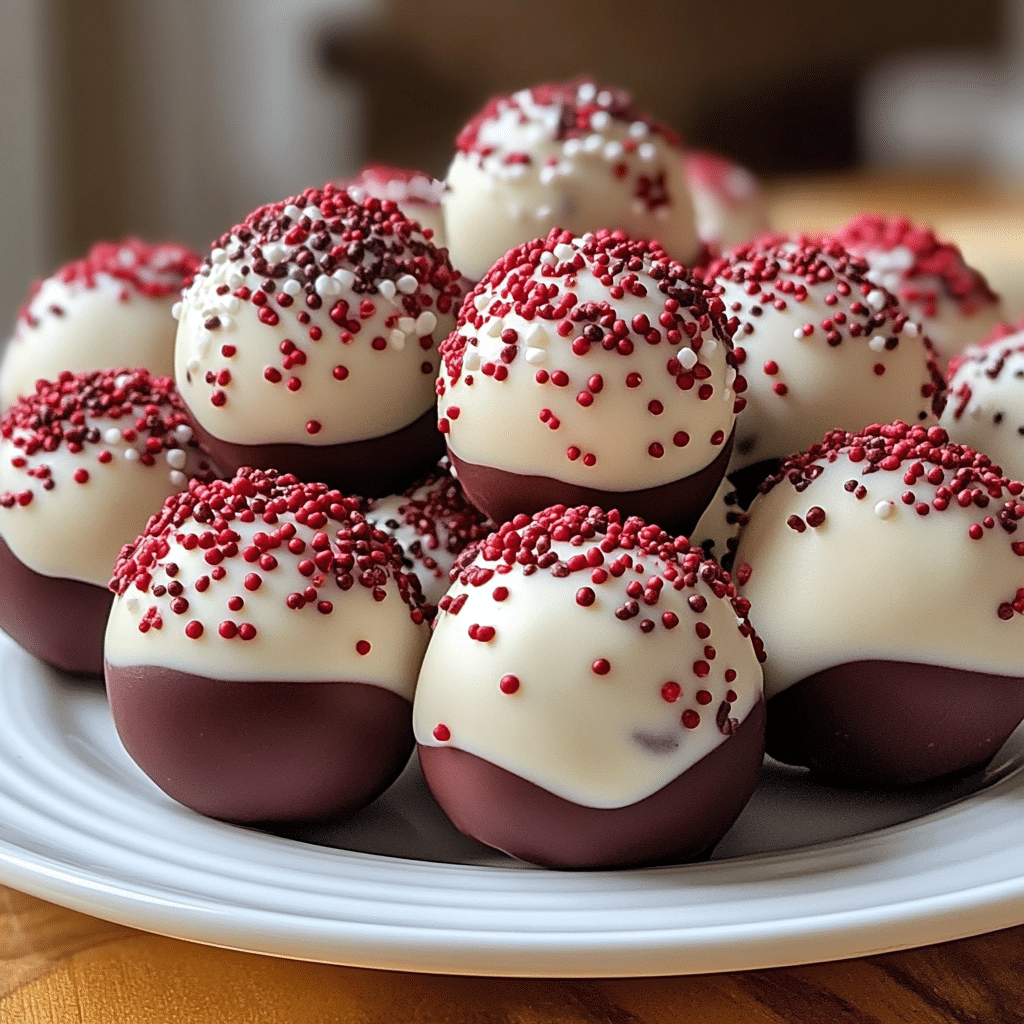
Red Velvet Cake Balls are a decadent and visually stunning dessert that combines the rich, tangy flavor of red velvet cake with a smooth, creamy coating. These bite-sized treats are perfect for any occasion, from holidays and birthdays to casual get-togethers. The contrast of the red cake center and white chocolate or cream cheese coating makes them not only a delicious treat but also a beautiful addition to any dessert table. Whether you’re an experienced baker or just getting started, these cake balls are incredibly simple to make and sure to wow your guests!
These cake balls are made from a moist red velvet cake base, mixed with cream cheese frosting to give them a soft, decadent texture. After being rolled into balls, they are dipped in melted chocolate, creating a rich outer shell. Perfectly portioned and easy to eat, these cake balls are an indulgent way to enjoy the classic red velvet flavor in a fun new form.

Why You’ll Love This Recipe
1. Perfect for Any Occasion
Red Velvet Cake Balls are versatile enough to serve at any event. Their vibrant color and bite-sized nature make them a fun and festive treat for holidays, birthday parties, weddings, or just a special dessert for yourself.
2. Easy to Make
Despite their impressive look, these cake balls are surprisingly easy to make. You simply bake the cake, crumble it, mix with frosting, form into balls, and coat with chocolate. No special equipment or skill is needed!
3. Beautiful Presentation
The red velvet color contrasts beautifully with the creamy white chocolate coating, making these cake balls eye-catching and perfect for any celebration or gathering.
4. Customizable
You can get creative with toppings or coatings. Try using different types of chocolate for the outer layer, or add sprinkles, edible glitter, or chopped nuts for extra flair.
5. Make Ahead and Freezer-Friendly
These cake balls can be made in advance and stored in the fridge or freezer. They last for several days, making them great for preparing ahead of time and enjoying later.

Ingredients
For the Cake:
- Red velvet cake mix
- Eggs
- Vegetable oil
- Water
- Buttermilk (optional, for extra richness)
For the Frosting:
- Cream cheese (softened)
- Powdered sugar
- Vanilla extract
For the Coating:
- White chocolate chips (or milk chocolate, dark chocolate, or candy melts)
- Sprinkles or chopped nuts (optional, for garnish)
Variations
- Different Coatings: While white chocolate is most commonly used, you can dip the cake balls in milk chocolate, dark chocolate, or even colored candy melts for a festive touch.
- Flavor Twist: Add a teaspoon of cocoa powder to the frosting for an extra chocolatey flavor or experiment with flavored extracts, such as almond or mint, for a unique twist.
- Nutty Red Velvet Cake Balls: Mix chopped walnuts or pecans into the cake mixture or sprinkle them on top of the finished cake balls for a crunchy contrast to the creamy coating.
- Mini Red Velvet Cake Balls: Make smaller-sized cake balls for a bite-sized treat that’s perfect for parties or gift-giving.
How to Make the Recipe
Step 1: Bake the Cake
Preheat your oven to 350°F (175°C). Prepare the red velvet cake mix according to the package instructions. Pour the batter into a greased 9×13-inch baking pan and bake for 25-30 minutes or until a toothpick inserted into the center comes out clean. Allow the cake to cool completely.
Step 2: Crumble the Cake
Once the cake has cooled, crumble it into small pieces using your hands or a fork. The goal is to break the cake into fine crumbs, which will help the frosting bind everything together.
Step 3: Make the Frosting
In a separate bowl, beat together the softened cream cheese, powdered sugar, and vanilla extract until smooth and creamy. You can adjust the amount of powdered sugar to get the right consistency for mixing into the cake crumbs.
Step 4: Mix the Cake and Frosting
Add the cream cheese frosting to the crumbled cake. Mix well until the crumbs are evenly coated and the mixture has a dough-like consistency. It should be moist enough to hold together when rolled into balls but not too wet.
Step 5: Shape the Cake Balls
Using your hands or a cookie scoop, take small portions of the cake mixture and roll them into 1-inch balls. Place the formed cake balls on a baking sheet lined with parchment paper.
Step 6: Dip in Chocolate
Melt the white chocolate chips in a microwave-safe bowl in 30-second intervals, stirring between each until smooth. Dip each cake ball into the melted chocolate, coating it evenly. Use a fork to lift the cake ball out of the chocolate and tap it gently to remove excess coating.
Step 7: Set and Decorate
Place the dipped cake balls back onto the parchment-lined baking sheet. You can decorate them with sprinkles, edible glitter, or chopped nuts while the chocolate coating is still soft. Let the cake balls sit at room temperature until the coating hardens.
Step 8: Serve and Enjoy
Once the chocolate coating has set, your Red Velvet Cake Balls are ready to enjoy! Serve them immediately or store them in an airtight container in the fridge for later.
Tips for Making the Recipe
- Use Room Temperature Cream Cheese: Ensure that the cream cheese is softened to room temperature for smooth frosting that blends easily with the cake crumbs.
- Crumbled Cake Consistency: Be sure to crumble the cake into small, fine crumbs to prevent any large pieces from affecting the texture of the cake balls.
- Chill Cake Balls: If your cake balls are too soft or difficult to handle, refrigerate them for 15-20 minutes before dipping them in chocolate. This will help them hold their shape better.
- Use High-Quality Chocolate: For the best coating, use good-quality chocolate or candy melts. This will make a smooth, glossy finish that sets perfectly.
- Toppings: Get creative with toppings like mini chocolate chips, colorful sprinkles, or even crushed candy cane for a festive look.
How to Serve
Red Velvet Cake Balls make a stunning addition to any dessert spread. Serve them at parties, family gatherings, or as a treat for holidays like Christmas, Valentine’s Day, or Easter. These little treats are great for individually wrapped gifts as well. Simply pack them in a box or gift bag for a homemade, thoughtful present.
Make Ahead and Storage
Storing Leftovers
Store the cake balls in an airtight container at room temperature for up to 4 days. For longer shelf life, keep them in the refrigerator, where they’ll stay fresh for about a week.
Freezing
You can freeze these cake balls for up to 3 months. Place them in a single layer on a baking sheet and freeze until solid, then transfer them to a freezer-safe container or bag. When ready to enjoy, thaw them at room temperature.
Reheating
Red Velvet Cake Balls are best enjoyed at room temperature. To enjoy them slightly warm, let them sit out for a few minutes before serving.
FAQs
1. Can I make the cake balls ahead of time?
Yes, you can prepare the cake balls in advance. You can freeze them before dipping in chocolate or store them in the fridge after they’ve been dipped.
2. Can I use cake mix other than red velvet?
Yes, you can experiment with other cake flavors like chocolate, vanilla, or even funfetti. Adjust the frosting and coating flavors accordingly.
3. Can I dip the cake balls in dark or milk chocolate?
Absolutely! Dark or milk chocolate will work just as well as white chocolate, offering a different flavor profile for your cake balls.
4. How do I prevent the chocolate from cracking when it sets?
Make sure the cake balls are completely cool before dipping in chocolate. Also, don’t overheat the chocolate when melting it, as this can cause it to seize and crack when setting.
5. Can I add sprinkles to the coating?
Yes! While the chocolate coating is still soft, you can sprinkle festive sprinkles, colored sugar, or even crushed nuts to decorate your cake balls.
6. How can I make these cake balls more festive for holidays?
For holidays, you can color the frosting or coating with themed food coloring or add sprinkles that match the occasion.
7. Can I make these cake balls vegan or gluten-free?
Yes, you can use a vegan red velvet cake mix and dairy-free frosting to make these cake balls vegan-friendly. For a gluten-free version, simply use a gluten-free cake mix.
8. How do I store leftover cake balls?
Keep your cake balls in an airtight container in the fridge for up to a week, or store them in the freezer for longer storage.
9. Can I use a different type of frosting?
While cream cheese frosting is the most common, you can use buttercream frosting or even chocolate ganache if you prefer.
10. Can I freeze the cake balls before dipping in chocolate?
Yes, you can freeze the cake balls after shaping them and before dipping them in chocolate. Once frozen, you can dip them in chocolate as usual.

Conclusion
Red Velvet Cake Balls are a delightful treat that’s both simple to make and visually impressive. With their soft, moist red velvet cake center, creamy frosting, and smooth chocolate coating, they’re a crowd-pleaser that’s perfect for any celebration. Whether you’re serving them at a holiday gathering, gifting them to friends, or simply enjoying them with family, these cake balls are sure to become a favorite. Make them ahead, store them, and enjoy them whenever the craving for a rich and delicious dessert strikes!
Print
Red Velvet Cake Balls
- Total Time: 2 hours (including chilling and setting time)
- Yield: 24–30 cake balls (depending on size) 1x
- Diet: Vegetarian
Description
These Red Velvet Cake Balls are a delightful and indulgent treat made from moist red velvet cake crumbled and coated in smooth white chocolate. Perfect for any occasion, especially Valentine’s Day, these bite-sized delights are sweet, rich, and easy to make—ideal for gifting or enjoying at home!
Ingredients
- 1 box (15.25 oz) red velvet cake mix (plus ingredients required on the box, usually eggs, oil, and water)
- 1 can (8 oz) cream cheese frosting
- 16 oz white chocolate (or candy coating, chopped)
- 1 tablespoon vegetable oil (for thinning chocolate, if needed)
Instructions
- Preheat your oven according to the instructions on the cake mix box. Prepare and bake the red velvet cake as directed, using the eggs, oil, and water indicated on the cake mix package. Allow the cake to cool completely.
- Once the cake is cooled, crumble it into a large bowl using your hands or a fork until it’s in fine crumbs.
- Add the cream cheese frosting to the crumbled cake. Mix thoroughly until the cake crumbs are completely coated and the mixture holds together when pressed.
- Using your hands or a small cookie scoop, form the cake mixture into small balls, about 1 inch in diameter. Place the cake balls onto a parchment-lined baking sheet.
- Refrigerate the cake balls for 1 hour to firm up.
- Melt the white chocolate or candy coating in a heatproof bowl, either over a double boiler or in the microwave in 20-second intervals, stirring each time. If the chocolate is too thick, add 1 tablespoon of vegetable oil to thin it out.
- Once the cake balls are chilled, dip each ball into the melted white chocolate, coating it completely. Use a fork or spoon to remove the ball and tap gently to remove excess chocolate. Place the coated cake balls back onto the parchment paper to set.
- Allow the chocolate coating to harden at room temperature. You can speed up the process by placing them in the fridge for a few minutes.
Notes
- You can use dark or milk chocolate instead of white chocolate for a different flavor.
- For added decoration, drizzle some extra melted chocolate over the top of the cake balls or sprinkle them with red sprinkles or crushed nuts.
- These cake balls can be stored in an airtight container for up to a week.
- Prep Time: 25 minutes
- Cook Time: 30-35 minutes (for baking the cake)
- Category: Dessert
- Method: Baking, Dipping
- Cuisine: American
Keywords: Red Velvet Cake Balls, Cake Pops, Red Velvet, Valentine’s Day Treats, Easy Cake Balls, Chocolate-Coated Cake Balls