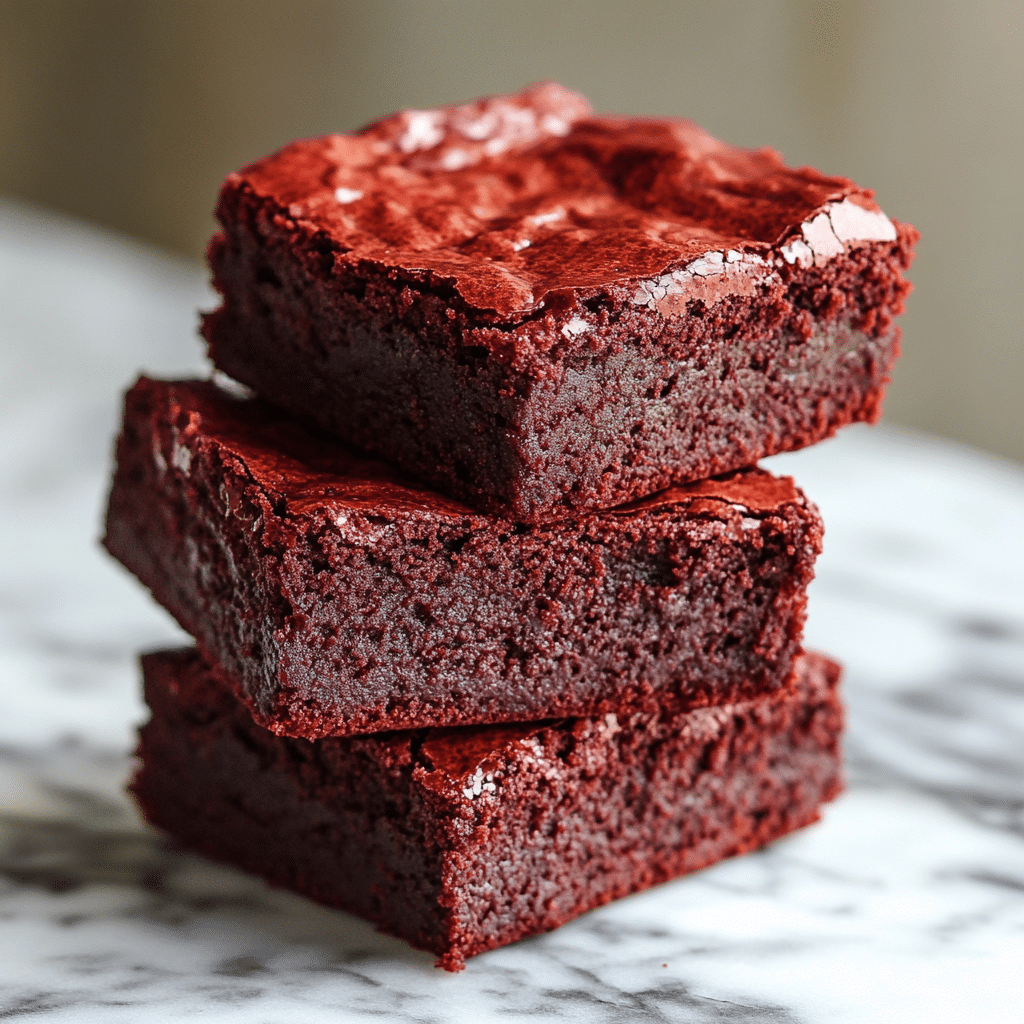
Red velvet lovers, this one’s for you. These Fudgy Red Velvet Brownies are everything a brownie should be—rich, moist, and decadently chocolatey, but with the signature tang and deep red hue of classic red velvet. Swirled with a velvety cheesecake layer, they bring that extra bit of indulgence that turns a good dessert into an unforgettable one.
This recipe strikes the perfect balance: not too cakey, not too dense, and bursting with flavor. The brownie base is bold and fudgy, with cocoa and a touch of vanilla, while the cheesecake topping adds creamy contrast. A splash of vinegar and a bit of red gel food coloring bring out the signature red velvet flavor and color, making these brownies as beautiful as they are delicious.
Whether you’re baking for a special occasion, holiday, or just a well-deserved treat for yourself, these brownies will impress. They look bakery-worthy but come together with pantry staples and a straightforward process. Even better, they slice cleanly and store well, making them ideal for gifting or serving at a gathering. This recipe brings together the charm of red velvet cake and the irresistible texture of a fudgy brownie in every bite.
Why You’ll Love This Recipe
- Cheesecake Swirl Heaven: The creamy layer perfectly balances the rich brownie base.
- Bakery-Style Results at Home: Impressive presentation with minimal effort.
- Rich and Fudgy Texture: These brownies are moist, chewy, and deeply chocolatey.
- Classic Red Velvet Flavor: Hints of cocoa, vanilla, and tang from vinegar.
- Easy to Customize: Make it your own with different swirl patterns or toppings.

Ingredients
Cheesecake Layer
- Full-fat cream cheese
- Granulated sugar
- Egg
- Vanilla extract
Brownie Layer
- All-purpose flour
- Unsweetened cocoa powder
- Kosher salt
- Granulated sugar
- Eggs
- Vanilla extract
- Red gel food coloring
- Neutral oil
- Unsalted butter
- Vinegar (white or apple cider)
Variations
- Marbled Look: Swirl the cheesecake topping more dramatically for a marbled effect.
- Nutty Addition: Add chopped pecans or walnuts to the brownie batter for crunch.
- Chocolate Chips: Stir in white or dark chocolate chips for extra richness.
- Mini Version: Bake in mini muffin tins for brownie bites with a cheesecake center.
- Spice It Up: Add a dash of cinnamon or cayenne for a subtle kick.
How to Make the Recipe
Step 1:
Preheat your oven to 350°F (175°C). Line an 8×8-inch baking pan with parchment paper and set aside.
Step 2:
Prepare the cheesecake layer. In a bowl, beat the cream cheese until smooth, then mix in sugar, egg, and vanilla extract until fully combined. Set aside.
Step 3:
In a separate bowl, whisk together flour, cocoa powder, and salt.
Step 4:
In a large mixing bowl, combine sugar, eggs, vanilla extract, food coloring, oil, melted butter, and vinegar. Mix until smooth.
Step 5:
Gradually fold the dry ingredients into the wet mixture until fully incorporated.
Step 6:
Pour most of the brownie batter into the prepared pan, reserving about 1/4 cup.
Step 7:
Spread the cheesecake mixture evenly over the brownie batter.
Step 8:
Dollop the reserved brownie batter on top and use a toothpick or knife to swirl for a marbled look.
Step 9:
Bake for 35–40 minutes, or until the center is set and a toothpick comes out with moist crumbs.
Step 10:
Let cool completely in the pan before slicing for clean edges.

Tips for Making the Recipe
- Use room temperature ingredients to ensure smooth mixing and a creamy cheesecake swirl.
- Red gel food coloring gives a deeper color without altering texture.
- Don’t overbake—the center should be set but still slightly fudgy.
- Chill before slicing for neater squares.
- Wipe the knife clean between cuts for the sharpest presentation.
How to Serve
Serve these brownies chilled or at room temperature with a glass of milk, hot coffee, or even a scoop of vanilla ice cream. For special occasions, drizzle with melted chocolate or dust with powdered sugar.
Make Ahead and Storage
Storing Leftovers
Store brownies in an airtight container in the fridge for up to 5 days. The flavors intensify over time!
Freezing
Wrap individual brownies in plastic wrap and place in a freezer-safe container for up to 2 months.
Reheating
Microwave for 10–15 seconds for a warm, gooey texture, or enjoy them cold straight from the fridge.
FAQs
1. Can I use natural instead of Dutch cocoa?
Yes, either works—Dutch gives a deeper color and smoother flavor.
2. Can I make this without red food coloring?
Yes, the taste will remain the same, but it won’t have the iconic red velvet look.
3. How do I know when the brownies are done?
Look for set edges and a slightly firm center; a toothpick should come out with moist crumbs.
4. Can I double the recipe?
Yes, double and bake in a 9×13-inch pan. Add extra baking time as needed.
5. What’s the best cream cheese to use?
Always use full-fat, block-style cream cheese for best results.
6. Can I use apple cider vinegar instead of white?
Absolutely, either one works in this recipe to bring out the red velvet tang.
7. Should I chill the brownies before serving?
Chilling helps them set for cleaner slices, but they’re also delicious warm.
8. Can I use a mixer for the batter?
A hand mixer is fine for the cheesecake layer, but gently mix the brownie batter to keep it fudgy.
9. Why do I need both oil and butter?
Oil adds moisture and chewiness, while butter brings richness and flavor.
10. How do I get a clean swirl?
Use a skewer or knife to gently swirl the top layer—don’t overmix, or the layers will blend too much.

Conclusion
These Fudgy Red Velvet Brownies with a creamy cheesecake swirl are everything you want in a dessert—rich, indulgent, and beautifully balanced. Whether you’re making them for Valentine’s Day, a party, or just because, they’re guaranteed to impress with both looks and flavor. Easy enough for a casual bake, but stunning enough to serve on a special occasion, these brownies are sure to become a favorite in your recipe rotation. One bite, and you’ll be hooked.
Print
The Best Fudgy Red Velvet Brownies Recipe
- Total Time: 50 minutes + cooling
- Yield: 16 brownies 1x
- Diet: Vegetarian
Description
These red velvet brownies are rich, fudgy, and irresistibly indulgent, with a gorgeous swirl of creamy cheesecake on top. The tangy cheesecake layer pairs perfectly with the deep cocoa flavor and signature red velvet hue, making them the ultimate treat for Valentine’s Day, holidays, or any time you’re craving something decadent and beautiful.
Ingredients
Cheesecake Layer
-
8 oz full-fat cream cheese, very soft (room temperature)
-
1/4 cup granulated sugar
-
1 large egg, room temperature, whisked
-
1 teaspoon vanilla extract
Brownie Layer
-
1 cup all-purpose flour
-
1/4 cup unsweetened cocoa powder (natural or Dutch processed)
-
1 teaspoon kosher salt
-
1 1/4 cups granulated sugar
-
3 large eggs
-
1 tablespoon vanilla extract
-
1–2 teaspoons red gel food coloring
-
1/3 cup neutral oil (like canola or vegetable)
-
1/2 cup unsalted butter, melted
-
2 teaspoons vinegar (white vinegar or apple cider vinegar)
Instructions
-
Preheat oven to 350°F (175°C). Line a 9×9-inch baking pan with parchment paper, leaving an overhang on the sides for easy removal.
-
Make the cheesecake layer: In a medium bowl, mix softened cream cheese and sugar until smooth. Add the whisked egg and vanilla extract. Stir until creamy and well combined. Set aside.
-
Make the brownie layer: In a large bowl, whisk together the flour, cocoa powder, and salt.
-
In another bowl, whisk sugar, eggs, vanilla extract, food coloring, oil, melted butter, and vinegar until fully combined.
-
Fold the wet ingredients into the dry ingredients until just mixed—do not overmix.
-
Pour most of the brownie batter into the prepared pan, reserving about 1/4 cup.
-
Pour the cheesecake mixture over the brownie batter and spread evenly.
-
Dollop the reserved brownie batter on top and use a knife or skewer to create swirls.
-
Bake for 30–35 minutes, or until the center is just set and a toothpick inserted comes out with moist crumbs.
-
Cool completely in the pan, then chill for at least 1 hour before slicing for clean cuts.
Notes
-
For deeper color, use a high-quality red gel food coloring—liquid food coloring may dilute the batter.
-
Chilling the brownies before cutting helps get clean layers and prevents smudging the cheesecake swirl.
- Prep Time: 15 minutes
- Cook Time: 35 minutes
- Category: Dessert
- Method: Baking
- Cuisine: American
Keywords: red velvet brownies, cheesecake brownies, valentine’s dessert, fudgy brownies, red velvet dessert

