
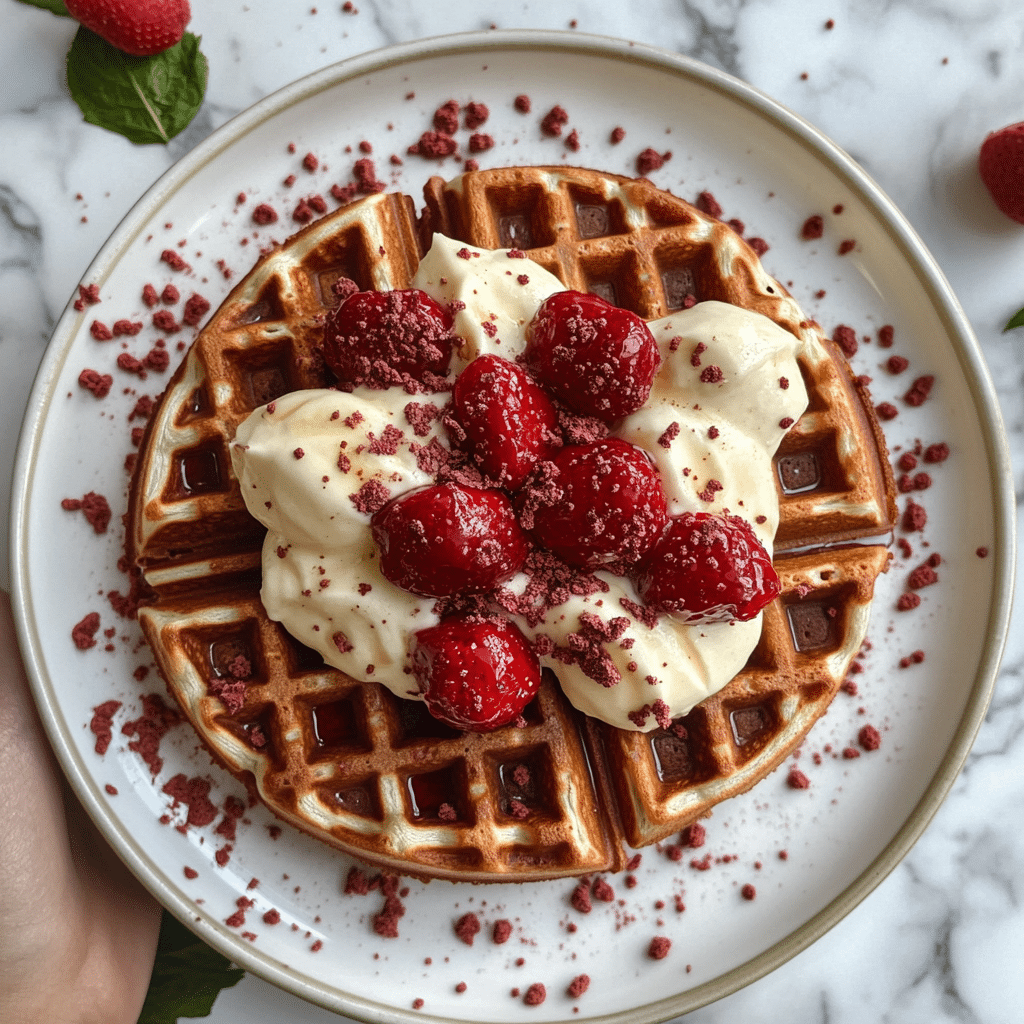
Indulge in the rich, velvety flavor of these Gluten-Free Red Velvet Waffles, the perfect treat for a special breakfast or brunch. With their stunning red color and soft, fluffy texture, these waffles are not only visually impressive but also deliciously satisfying. Whether you’re celebrating Valentine’s Day, enjoying a cozy weekend morning, or simply craving something a little different, these waffles are sure to become a favorite. The combination of cocoa and vanilla flavors, along with a hint of tangy cream cheese topping, makes for an unforgettable breakfast experience. Plus, since they’re gluten-free, everyone can enjoy them without worry!
What makes these waffles even better is how easy they are to make. You don’t have to sacrifice flavor or texture when making them gluten-free. With the perfect balance of sweetness, cocoa, and a creamy finish, these waffles have a rich taste that will leave you craving more. Whether served with syrup, fresh berries, or a dollop of whipped cream, these waffles are a treat everyone can enjoy. Let’s dive into how to make this show-stopping, gluten-free breakfast treat!

Why You’ll Love This Recipe
1. Rich and Decadent Flavor
The subtle cocoa flavor combined with a hint of vanilla and the bright red color make these waffles feel like an indulgent treat—perfect for any special occasion or a cozy morning at home.
2. Gluten-Free Delight
These waffles are made with gluten-free flour, ensuring that everyone can enjoy them without the worry of gluten-related issues, making them a perfect choice for those with dietary restrictions.
3. Easy to Make
Despite their impressive appearance, these waffles are simple to prepare and require just a few basic ingredients. They’re perfect for beginner bakers and busy mornings alike.
4. Versatile and Customizable
Top these waffles with your favorite toppings, such as fresh fruit, syrup, or whipped cream, to make them your own. You can also experiment with adding chocolate chips, nuts, or a sprinkle of powdered sugar for extra flair.
5. Visually Stunning
The bright red color of these waffles makes them visually appealing and perfect for a holiday brunch, celebrations, or even as a fun twist on a classic breakfast.
Ingredients
For the Waffles:
- Gluten-free all-purpose flour
- Cocoa powder
- Baking powder
- Salt
- Granulated sugar
- Eggs
- Buttermilk (or dairy-free alternative)
- Unsweetened applesauce (or vegetable oil)
- Vanilla extract
- Red food coloring (optional)
For the Cream Cheese Topping (Optional):
- Cream cheese (softened)
- Powdered sugar
- Vanilla extract
- Heavy cream (or milk)
Variations
- Dairy-Free Option: Replace buttermilk with a dairy-free alternative such as almond milk and use a dairy-free cream cheese for the topping.
- Add-ins: Feel free to add chocolate chips or chopped nuts to the batter for an extra boost of flavor and texture.
- Richer Flavor: For a deeper red velvet flavor, you can add a bit of vinegar to the batter, as it’s a classic ingredient in red velvet cakes and enhances the cocoa taste.
- Fruity Topping: Top the waffles with fresh berries, such as raspberries or strawberries, for a refreshing contrast to the sweet, rich waffles.
How to Make the Recipe
Step 1: Preheat Your Waffle Iron
Start by preheating your waffle iron according to the manufacturer’s instructions. Lightly grease it with cooking spray or a little bit of oil to ensure the waffles don’t stick.
Step 2: Mix the Dry Ingredients
In a large bowl, whisk together the gluten-free all-purpose flour, cocoa powder, baking powder, salt, and sugar. Set aside.
Step 3: Mix the Wet Ingredients
In a separate bowl, beat the eggs and then add the buttermilk, applesauce (or oil), and vanilla extract. If you’re using food coloring, add a few drops of red food coloring to achieve that vibrant red hue.
Step 4: Combine the Wet and Dry Ingredients
Add the wet ingredients to the dry ingredients, stirring until just combined. Be careful not to overmix the batter. If you want a thinner batter, add a little extra buttermilk to reach your desired consistency.
Step 5: Cook the Waffles
Once the waffle iron is heated, pour the batter onto the iron (about 1/4 cup of batter per waffle, depending on the size of your waffle iron). Close the iron and cook according to your waffle iron’s instructions, usually about 3-5 minutes, until the waffles are golden brown and cooked through.
Step 6: Prepare the Cream Cheese Topping (Optional)
While the waffles are cooking, prepare the cream cheese topping. Beat the softened cream cheese with powdered sugar, vanilla extract, and heavy cream until smooth and creamy. If you want a thicker consistency, add less heavy cream.
Step 7: Serve
Serve the waffles hot, topped with a dollop of cream cheese topping, fresh berries, or a drizzle of maple syrup. Enjoy the delicious combination of flavors!

Tips for Making the Recipe
- Don’t Overmix the Batter: When combining the wet and dry ingredients, mix until just combined. Overmixing can result in dense waffles.
- Adjust the Red Coloring: The red food coloring is optional, but it really enhances the red velvet appearance. Add more or less to achieve your desired color.
- Check the Waffle Iron’s Temperature: Make sure your waffle iron is properly heated before adding the batter for the best results.
- Keep Waffles Warm: If you’re making a large batch of waffles, keep them warm in the oven at a low temperature (around 200°F/90°C) while you cook the rest.
How to Serve
Serve these Gluten-Free Red Velvet Waffles with your favorite toppings. You can top them with a sweet cream cheese frosting, a dollop of whipped cream, or fresh fruit like strawberries or raspberries. A drizzle of maple syrup or chocolate syrup also complements the rich, cocoa flavor beautifully. For an extra touch, sprinkle with powdered sugar or crushed nuts for texture.
Make Ahead and Storage
Storing Leftovers
These waffles are best enjoyed fresh, but if you have leftovers, store them in an airtight container in the fridge for up to 2 days. To reheat, place them in a toaster or toaster oven to crisp them back up.
Freezing
You can freeze these waffles for up to 1 month. To freeze, let them cool completely, then place them in a single layer on a baking sheet in the freezer. Once frozen, transfer them to a freezer-safe bag or container. Reheat in the toaster or oven for the best results.
Reheating
Reheat leftover waffles in the toaster or on a baking sheet in a preheated oven at 350°F (175°C) for 5-7 minutes, or until warmed through and crisped to your liking.
FAQs
1. Can I use a different type of flour?
Yes, you can use a gluten-free flour blend that is specifically made for baking if you don’t have gluten-free all-purpose flour on hand.
2. Can I make these waffles dairy-free?
Yes, you can replace the buttermilk with a dairy-free milk (like almond milk) and use dairy-free cream cheese for the topping.
3. Can I make these waffles ahead of time?
Yes, you can make them in advance and store them in the fridge or freezer. Reheat them in a toaster or oven for the best results.
4. How can I make the waffles fluffier?
For fluffier waffles, make sure to use baking powder and avoid overmixing the batter. If the batter seems too thick, you can add a little more buttermilk.
5. Can I add chocolate chips to the batter?
Yes, you can fold in chocolate chips to the batter for a bit of extra sweetness and texture.
6. Can I freeze these waffles?
Yes, these waffles freeze well. Just let them cool completely, then freeze them in a single layer before storing them in an airtight container or bag.
7. How long do these waffles last?
When stored properly, these waffles will last for about 2 days in the fridge and up to 1 month in the freezer.
8. Can I make these waffles without red food coloring?
Yes, you can skip the food coloring if you prefer, but they won’t have the classic red velvet look. The flavor will remain the same!
9. Can I make these waffles without the cream cheese topping?
Yes, you can skip the cream cheese topping and serve the waffles with maple syrup, fresh fruit, or whipped cream instead.
10. How can I make these waffles more chocolatey?
Add an extra tablespoon of cocoa powder to the batter for a more intense chocolate flavor.

Conclusion
Gluten-Free Red Velvet Waffles are a fun and delicious way to start your day or celebrate a special occasion. With their rich flavor, stunning red color, and easy preparation, they’re sure to impress anyone you serve them to. Whether you’re making them for a holiday brunch, a romantic breakfast, or just because, these waffles are guaranteed to be a hit. Customize them with your favorite toppings, and enjoy a decadent, gluten-free breakfast that tastes as good as it looks!